We have a two part blog this week. The first part is about building crates for two works of art that were being shipped across the country. The second is about a project that has been in the works for years... You'll have to read the first half the blog to find out what it is.
So, on to part one! While Poster Mountain and LA Paper Group are conservation and restoration studios, we are happy to consult on anything that is poster/paper related, which is how we ended up working on this project. A client brought in two framed pieces of art work that were being shipped across the country, but he was leery of just putting them in a cardboard box. We generally ship posters out in tubes, but since these pieces were framed that was not an option. So John told him that we (we meaning Gabe, our resident handyman and power tool expert) could build individual crates for each piece. It was an added bonus that the two pieces were really cool. One is original art and the other is an artist's proof, both by the well known illustrator Drew Struzan. (Struzan has created recognizable works for the Star Wars and Indiana Jones franchises, as well as numerous other movies, so this was even cooler for most of us than getting to hold a Picasso.)
 |
| Pictured: The Thing, art by Drew Struzan. |
 |
| Pictured: Creature from the Black Lagoon, art by Drew Struzan. |
One of the pieces was framed with plexiglass, but the other one was framed with real glass. Shipping a piece that is framed with glass is obviously more difficult because of the fragile nature. Our solution to this was to build the crates with enough room that we could line them and wrap each piece in bubble wrap. Gabe began by building the sides of the crate out of 2 by 4s. He created a square frame from four pieces of wood and used screws to secure each corner.
 |
| Pictured: Gabe had already assembled 3 of the sides by the time we came in to take pictures. |
 |
| Pictured: The sides of the frame are clamped down so that they don't move while Gabe puts in the screws. |
 |
| Pictured: Gabe with power tools! |
Next he cut out a piece of plywood that formed the bottom of the crate and screwed that in to place.
 |
| Pictured: Gabe is cool enough to wear his sunglasses inside, but he is also putting safety first and using them as safety goggles. |
 |
| Pictured: Gabe screwing in the bottom of the crate. |
 |
| Pictured: One crate, made to order! |
After the sides and bottom were ready to go, the next step was to add in insulation. Gabe cut a foam panel and glued it to the inside of the crate to act as a shock absorber.
 |
| Pictured: Foam panel before Gabe glues it in. |
 |
| Pictured: Gabe using gorilla glue to add foam panels to the sides. |
Once the crate was ready to go we began to prep the piece for shipping. This included taping the glass so that if it did break the tape would prevent the glass from damaging the art. Gabe added another layer of foam inside the frame on top of the reinforced glass, too. We then wrapped the whole piece in bubble wrap. We were not taking any risks with these two pieces.
 |
| Pictured: Gabe laying strips of tape across the glass. |
 |
| Pictured: Gabe taping down a piece of foam on top of the glass. |
 |
| Pictured: Yet another layer, sealing it inside plastic as an additional precaution. |
 |
| Pictured: The framed piece next to the crate. |
 |
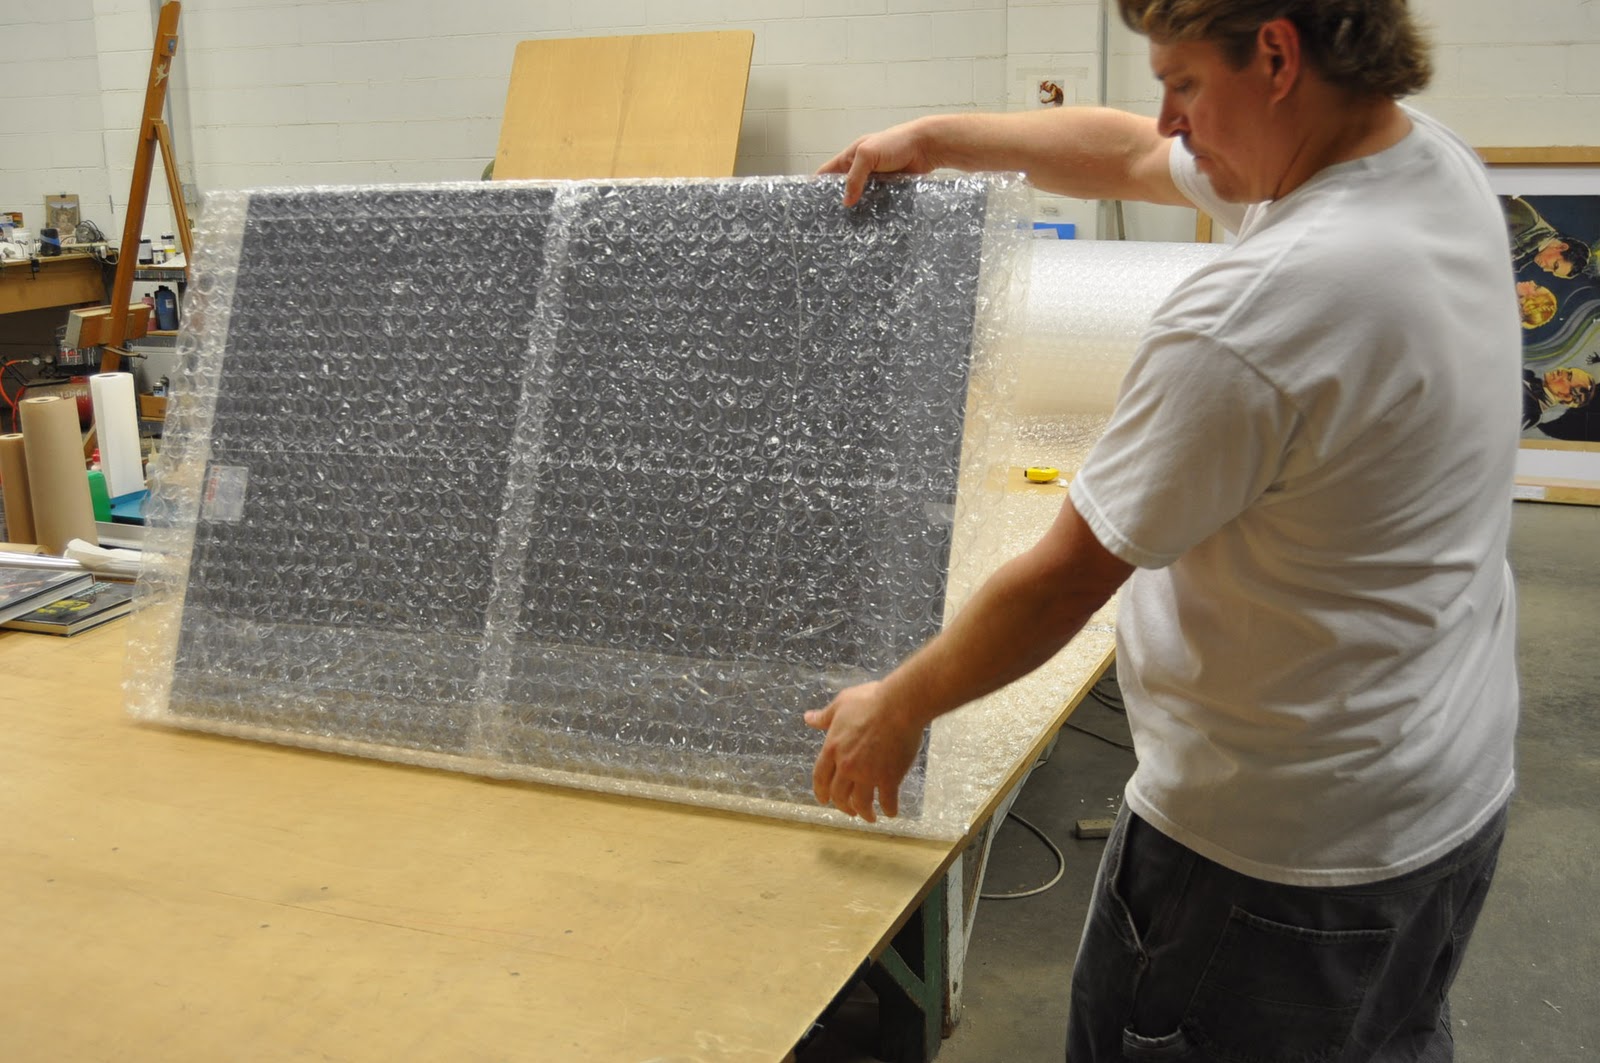
| Pictured: Gabe taping the edges of the bubble wrap to the frame. |
 |
| Pictured: Just to give you an idea, we used all of the bubble wrap that was laid out on the table in the last photo. |
 |
| Pictured: Art work and frame completely encased in bubble wrap. |
The last step before sealing the crate was to add a little more padding of bubble wrap around the edges and one more layer of foam to on top of all that. Then the lid was nailed into place and it was ready to go.
 |
| Pictured: Gabe gently placing the piece inside the crate. |
 |
| Pictured: For both crates that we built there were 3 layers of foam paneling and about 20 feet of bubble wrap. |
 |
| Pictured: Gabe placing the last piece of foam on top. |
 |
| Pictured: The lid of the crate clamped into place before Gabe seals it. |
 |
| Pictured: Gabe securing the lid with screws. |
 |
| Pictured: Voila! Ready to be shipped, with lots of warnings written all over it. |
Gabe did the same thing to make the second crate, although slightly smaller. The larger one ended up weighing about 70 lbs and the smaller one about 50 lbs. Something that heavy and with such special instructions, they could not be turned on the side and we advised that nothing be put on top of them, the only way to ship them was through freight.
Now on to part 2!
The second part of this week's blog is a project that is still in progress. It is a Douglass Fairbanks "Black Pirate" one sheet. John had been putting this project off for years because it is one of the most difficult pieces that he has ever agreed to work on. It was mounted to a wooden board with cheesecloth sandwiched in between and more types of adhesive than John had ever seen used at once. However, Lindsay, John's last administrative assistant, left at the end of May to go back to school and she wanted this to be her last project.
 |
| Pictured: The poster came to us mounted on a thin wooden board, with cheesecloth as a substrate and more types of adhesive than is plausible. |
 |
| Pictured: The cheesecloth underneath the poster is visible through the small tears in the poster. |
 |
| Pictured: The poster was tearing and lifting off in places and wrinkling in others. |
 |
| Pictured: The poster was lifting off of the cheesecloth along the edges and the cheesecloth was lifting off of the board along the edges. |
 |
| Pictured: The poster was delaminating around the edges, although getting the rest of it off was a monstrous feat. |
Step one was demounting the poster from both the cheesecloth and the board. John and Lindsay used a steamer and a special soap to dissolve the water soluble adhesive, but this still left a lot of adhesive. They eventually had to take the poster off of the board in pieces, removing each piece by sliding a spatula underneath it and slicing it away from the adhesive. The entire process of demounting took the whole day. They also cracked the glass top on one of our wet mount tables when the steamer was left on it too long.
 |
| Pictured: Lindsay removing a piece with a very sharp spatula. |
 |
| Pictured: Lindsay working on removing each piece carefully. The pieces that had already been removed were placed on sheets of hollytex. |
 |
| Pictured: Lindsay making progress. More of the pieces are laying on the table behind her. |
 |
| Pictured: Lindsay pulling off one of the bigger chunks of poster that they were able to get off. |
 |
| Pictured: All the tiny little pieces that would have to be put back together again. |
 |
| Pictured: A detail of one of the pieces that was removed from the board. |
 |
| Pictured: This is the board after John and Lindsay removed as much of the poster as possible. |
 |
| Pictured: A great detail of the cheesecloth, tape and glue mess left on the board after the poster was demounted. |
 |
| Pictured: I made this image extra large so you can see the chip missing out of the glass and the crack running right through the center that happened when they left the steamer sitting directly on the glass for too long. |
After all of the pieces were removed from the board the next step was to put it back together. Not as simple as it sounds. John and Lindsay basically had a giant puzzle on their hands.
 |
| Pictured: All of the smaller pieces laying on pieces of hollytex. At this point everything is still wet. |
 |
| Pictured: The larger pieces beginning to be put together on a sheet of hollytex. |
Putting the pieces of this poster back together was a multi-step process and you'll have to check back next week to see how John and Lindsay did it!
It should be noted that several crucial steps in our process have been omitted. If you have any questions please feel free to contact us via email at postermount@aol.com or by phone at 818.882.1214. Also check out our websites:
http://www.postermountain.com and
http://www.lapapergroup.com/. Please feel free to leave comments or questions on the blog!


Amazing work! I can't begin to tell you how much fun it is to read what you guys are working on. Can't wait to see the next installment on this project.
ReplyDeleteIt's a good thing that the crate is customized to fit the artwork! A crate is what is needed to ship fragile materials and delicate artwork such as this one, including electronic equipment. Also, you could reuse it the next time you need to ship something or you could simply use it as a storage at home. [Pedro@
ReplyDeletePackCrateAndShip.com ]
An artwork wrapped as tight as how you did will definitely stay protected no matter how bumpy the road gets while in transit. However, it must still be carried with added caution to ensure it's 100% protected and free from any sort of damage. Kudos on packing that precious artwork properly!
ReplyDeleteRenea Luong @ Legacy