This is the third part of the Blackstone project series. You can read the first two parts
here and
here.
We left off with Blackstone mounted to linen, all finally in one piece. It is starting to look like a poster. Before we can restore all the holes and cuts, we will have to fill them in with paper and filling compound to achieve a perfectly flat surface. This poster will be getting a lot of airbrushed painting which tends to highlight surface irregularities so we will have to take extra care during this step.
Since this poster has so much prep work to be done, we called in our former employee Antonia. She is the prep master of the universe. Her work is impeccable. Gabe took advantage of the opportunity to watch and learn from her that day.
 |
| Blackstone has a mauve border surrounded by a bare paper border, both of which are missing in large areas. Antonia and Gabe use a yardstick to measure out where the extra borders will be placed. |
 |
| They select paper from a large bin of scrap vintage posters. The paper has to be the right thickness and size before it's cut to fit the missing areas. |
 |
| Antonia sands the edges of all the holes to get a good bevel. She then traces the shape of each hole, cuts a bit of paper to match the shape, sands the back edges of the bit to match the bevel of the hole, and then glues it in place. Next she covers all the tinier holes, ridges, and cracks with filling compound and lets them dry before sanding them smooth. |
 |
| Here is what the poster looks like after prep. All the cracks and holes look more exaggerated because of the white filling compound. Almost all of the surface will be airbrushed, covering it in a fine mist of paint. Not only is this far more expedient time-wise, but airbrushing easily mimics the speckly stone-lithographed quality of this poster. |
 |
| A closer look at a large gulley filled which has been prepped. The filling compound is deliberately spread slightly over the edges of the hole. This aids in smoothness. |
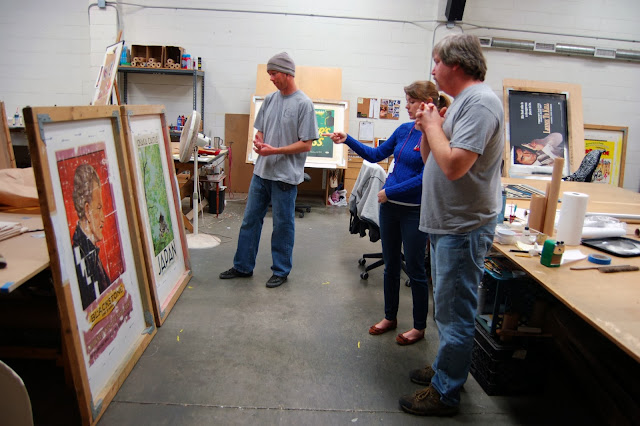 |
| John, Melissa, and Aaron discuss restoration--which areas to paint first and how opaque the paint should be in each region. The mauve and paper-colored borders and the text will have very thick coats of paint seeing as how they're all flat and blank. The orangey-red background, because it's textured, will have a translucent coat of paint, so that the cracks are still faintly visible and can later be detailed with pencils. The face, hair, and parts of his suit will be left alone for the time being. |
 |
| Melissa uses watercolors to tone down some of the very white parts of
the red background before Aaron airbrushes it. This way he will only
need to apply a very fine mist of paint to minimize those holes. |
 |
| Blackstone has been masked for the red shot of airbrushing. This means everything but the red has been covered with a protective layer of plastic or kraft paper. You can see the acetate's glare over his ear. This was taken midway through the airbrushing process and the mist of red and orange paint is apparent on his face and in the lower border. |
 |
| Aaron adds back some of the darker red accents. He uses a specially-cut piece of card as a sort of improvised hand-held mask in order to imitate the pattern. |
 |
| The red airbrushing is complete. |
 |
| Melissa and Gabe discuss Blackstone's dinner jacket. Most of it will have to be heavily painted, but the cravat and some of the finer lines will be left to detailing. |
 |
| The jacket midway through airbrushing. | T. | | |
|
Here is a good place to explain the problems of paint combined with
glare. It is ideal to always keep restoration confined to the problem
area, i.e., paint the hole, paint only the hole and nowhere else but the
hole. The problem is, even if you get that hole to disappear perfectly, if you tilt the paper
at an angle it will immediately reappear. Paint's
texture does not match that of paper and so that's what you get.
When dealing with small problems like a few stray tears or cracks, detailing is perfectly acceptable. Pencils can be used and their texture problem is less than paint. Same with watercolors. The texture may show up at an angle, but if the problem is not big then airbrushing is not necessary.
Airbrushing becomes necessary as the number and/or size of cracks, holes and tears increases. The fine paint mist can be spread out and diffused. So take the example above. Aaron has begun by painting the white grid of cracks and the large rectangular holes. He'll let that paint dry and then, as you can see below, he'll begin diffusing the look of it by spraying fine layers of paint all over the paper.
 |
| The mauve border is completed. You can see it is now quite a bit more mauve than it's previous pinkish hue. The poster was actually mauve before it faded to pink over time. So you can relax about that. Mauve is weird, but in this case it's correct. |
 |
| Gabe masks for the black text. |
 |
| After the black text is painted. |
 |
| Aaron gives us a peek under the mask as he works on the yellow banner area. |
 |
| Here the yellow is finished and the poster is passed on to me (Katie) for the last bit of work. |
Here is what's left:
 |
| I begin by using watercolor paints to darken some of the bright white areas of his skin before lightly airbrushing. |
 |
| Midway through airbrushing the face. I don't want to obscure any of the fine shading so I have to go little by little here. I will use pencils on a few faint lines after I blend out the larger problems with the airbrush. |
 |
| Here I've got my sweater on backwards while I work on Blackstone's hair. As you can see I've got my own improvised hand-held mask in order to mimic the wavy pattern. |
 |
| (This is me from another angle.) |
 |
| The finer lines will be penciled in. |
 |
| Hair and skin are done, and now on to the clothes. |
 |
| Before |
 |
| Ever-so-close |
 |
| FINISHED!! |
This was a massive project, taking over a month to complete. The methods we used here were way more aggressive than we normally feel comfortable with. This poster was a very unusual case, as I've stated previously, because it was previously mounted to a board using irreversible glue. Had it been linen backed in a more kosher method, it would not have been torn to shreds in the demount, the restoration would not have been so aggressive, and the poster, had it become damaged again, would be able to be demounted and re-restored indefinitely. As it is this poster must be hermetically sealed (or at least framed) and never disturbed again.
So stay away from Elmer's glue.


Magnificent! Thank you.
ReplyDelete