One of the many things that I love about my job is that it is a constant learning experience. In the last year we have gotten so many weird and interesting projects that have expanded our knowledge by leaps and bounds. Last year a client brought in a six panel Chinese folding screen and it was a huge, time consuming project because it was the first time we had ever done anything like that. (See the blog posts for that screen
here) A few weeks ago a client brought in another Chinese folding screen. This one had been torn by a small child and 3 of the 4 panels were warping around the tears because of a change in humidity.
 |
| Pictured: So even though we took more than 700 photos for this project, none of them were just simple before photos. This is the closest we have. |
 |
| Pictured: A 4 year old wreaked some havoc on this poor screen. |
 |
| Pictured: Although having seen the havoc that toddlers can cause, this isn't too bad. And we've definitely seen worse. |
The client didn't want the tears perfectly restored, just repaired so that
they weren't so obvious. The biggest issue was the warping. If we could
get the paper to relax and flatten back out again, the tears wouldn't be
so glaring. The screen as a whole was too big to fit into our humidity
chamber. We spent a couple of days brainstorming. This included a discussion
about creating a room with plastic and pvc piping or sealing off the
kitchen to give us a space where we could build up enough humidity to
get the paper to relax. After a few days of what
felt like banging our heads against a wall, John finally started poking
around the edges with one of his sharpened spatulas and had the
idea of taking each panel off the frame one at a time and working with them that
way.
 |
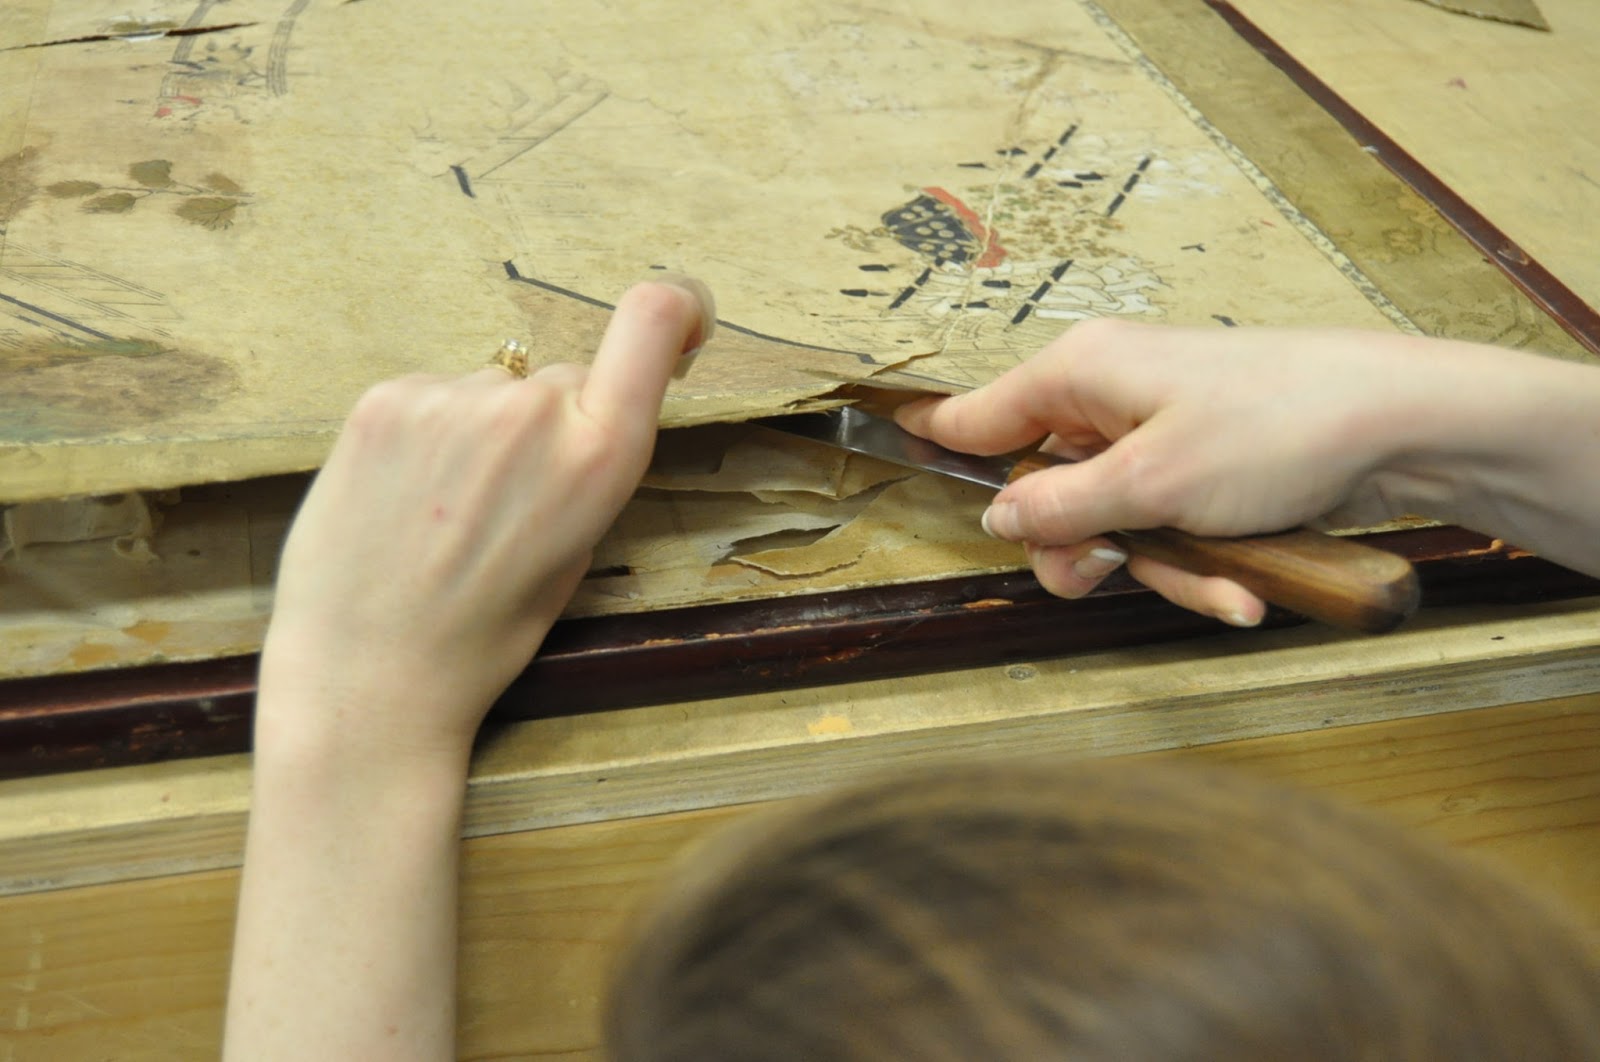
| Pictured: Melissa beginning to slice between the layers to peel away the top of the panel. |
 |
| Pictured: There are layers and layers of very thin paper that are glued together to create the substrate of each of these panels. |
Melissa started along the edges, working her way carefully and slowly around with the spatula to separate the top layer of paper from the lower layers of rice paper.
 |
| Pictured: Unlike the last screen we did, we were not replacing the silk, so it came right off with the rest of the panel. |
 |
| Pictured: This piece reminded me of an onion, peel back one layer and you find even more. |
The way that these screens were built is with an internal wooden lattice frame with layers of very thin rice paper glued together underneath the top layer with integrated paper hinges that made the entire screen light weight and easily portable. Once we got a look underneath the image we realized that there had probably been
some conservation and repair work done on this screen in the past. Strips of the original paper were missing or torn and there were some tissue patches holding together previously repaired tears.
 |
| Pictured: The diagonal strip of lighter paper is a tissue repair from previous conservation. |
John and Melissa agreed that most of the thin layers of paper underneath should be stripped away and a new Okawara backing applied to the panel. This would hopefully minimize the tears, fix the warping while also stabilizing the whole panel for the future.
 |
| Pictured: The paper that forms the substrate for the frame is very thin and fragile on its own and a lot of these pieces had begun to deteriorate. |
 |
| Pictured: Here you can see the wooden internal grid-work that supports the frame while allowing it to be strong but delicate. |
We were conserving 3 of the 4 panels, so Melissa took those 3 off the frame and peeled away the damaged paper lining for all of them before we began the conservation and backing of the panels.
Each individual panel would fit into the humidity chamber easily and were left in there for several hours for the paper to become malleable.
 |
| Pictured: Emerging from it's spa treatment! |
We have a lot of work space in the back, but getting large scale pieces like this into the back from the humidity chamber sometimes looks like an obstacle course. We did make it back to the capillary table though, where a piece of clean, dry Mylar was taped completely flat.
 |
| Pictured: Maneuvering large pieces around this corner and down the hallway is never fun, but at least in this photo you can see the gold leafing. |
 |
| Pictured: There is a piece of dry Mylar taped to the table, which you'll see why later. |
 |
| Pictured: I'm removing once of the previous patches that was holding this piece together. |
After removing a few stray patches, Melissa applied glue to the back.
 |
| Pictured: My job at this point was to make sure that the panel didn't move while Melissa applied the glue. |
 |
| Pictured: Removing excess glue. |
Ok, this is where the Mylar being taped down to the table comes in. We were paper backing this piece with Okawara to stabilize it. Our paper backing is done by gluing the outer edges of the paper to the melamine boards and then gluing the back of the piece. But because we had humidified the piece instead of washing it, there was nothing holding it to the Mylar and thus we couldn't move the panel and Mylar over to the backing. So we brought the backing to the panel.
 |
| Pictured: Lifting this board was not easy, but if Mohammed won't come to the mountain... |
 |
| Pictured: Lifting the board wasn't easy, but keeping it positioned over the piece so that Melissa could make sure it was placed just right and so that John could take this picture strained my girly muscles just a bit. Totally worth it. Notice the giant, upside-down 7-Up billboard in the background. |
 |
| Pictured: Applying as much pressure as we could to ensure an even adhesion, I feel like this photo is the beginning of a joke, "How many conservators does it take to count to 30?" Or, "Light as a feather, stiff as a board" |
We have occasionally used this technique before and it has worked, but that moment when you bring the board back up is always terrifying. However, as you can see from the photos we were successful.
 |
| Pictured: Voila! Gabe and me lifting the board after applying enough pressure to get the glue to adhere to the Okawara. |
Melissa then spread another piece of Mylar on top and squeegeed the panel down to make sure it was thoroughly adhered to the Okawara substrate.
 |
| Pictured: This was one of John's favorite photos because it is such an elegant shot of Melissa. |
After checking that the large tear through one of the corners was aligned properly, this piece was left to dry over night before starting the next step.
 |
| Pictured: The tear through the corner has already improved drastically. |
We'll have the conclusion up soon!
It should be noted that several crucial steps in our process have been
omitted. If you have any questions please contact us
via email at postermount@aol.com or by phone at 818.882.1214. Also
check out our websites:
http://www.postermountain.com and
http://www.lapapergroup.com/. Please feel free to leave comments or questions on the blog!


This looks like a very expensive process! I have an old Chinese screen with a small area that is torn--nothing like the one featured here. Any idea of a ball figure on the cost to repair it? I live in California. Thanks, Richard Souza
ReplyDeleteAfter reading this blog, I can say that another great writer in the making already.
ReplyDeletebest-portable-folding-workbenches
Useful information shared..I am very happy to read this article..thanks for giving us nice info.Fantastic walk-through. I appreciate this post.
ReplyDeletehard disk recovery dubai