When we put up our first blog about a silkscreen restoration (
January post about a Tyler Stout "Lost" print) we had no idea that we would get such a huge response. We are thrilled that so many people have sent us their silkscreens for restoration. This week's project came from that response and is a Flaming Lips silkscreen by the artist Jay Ryan.
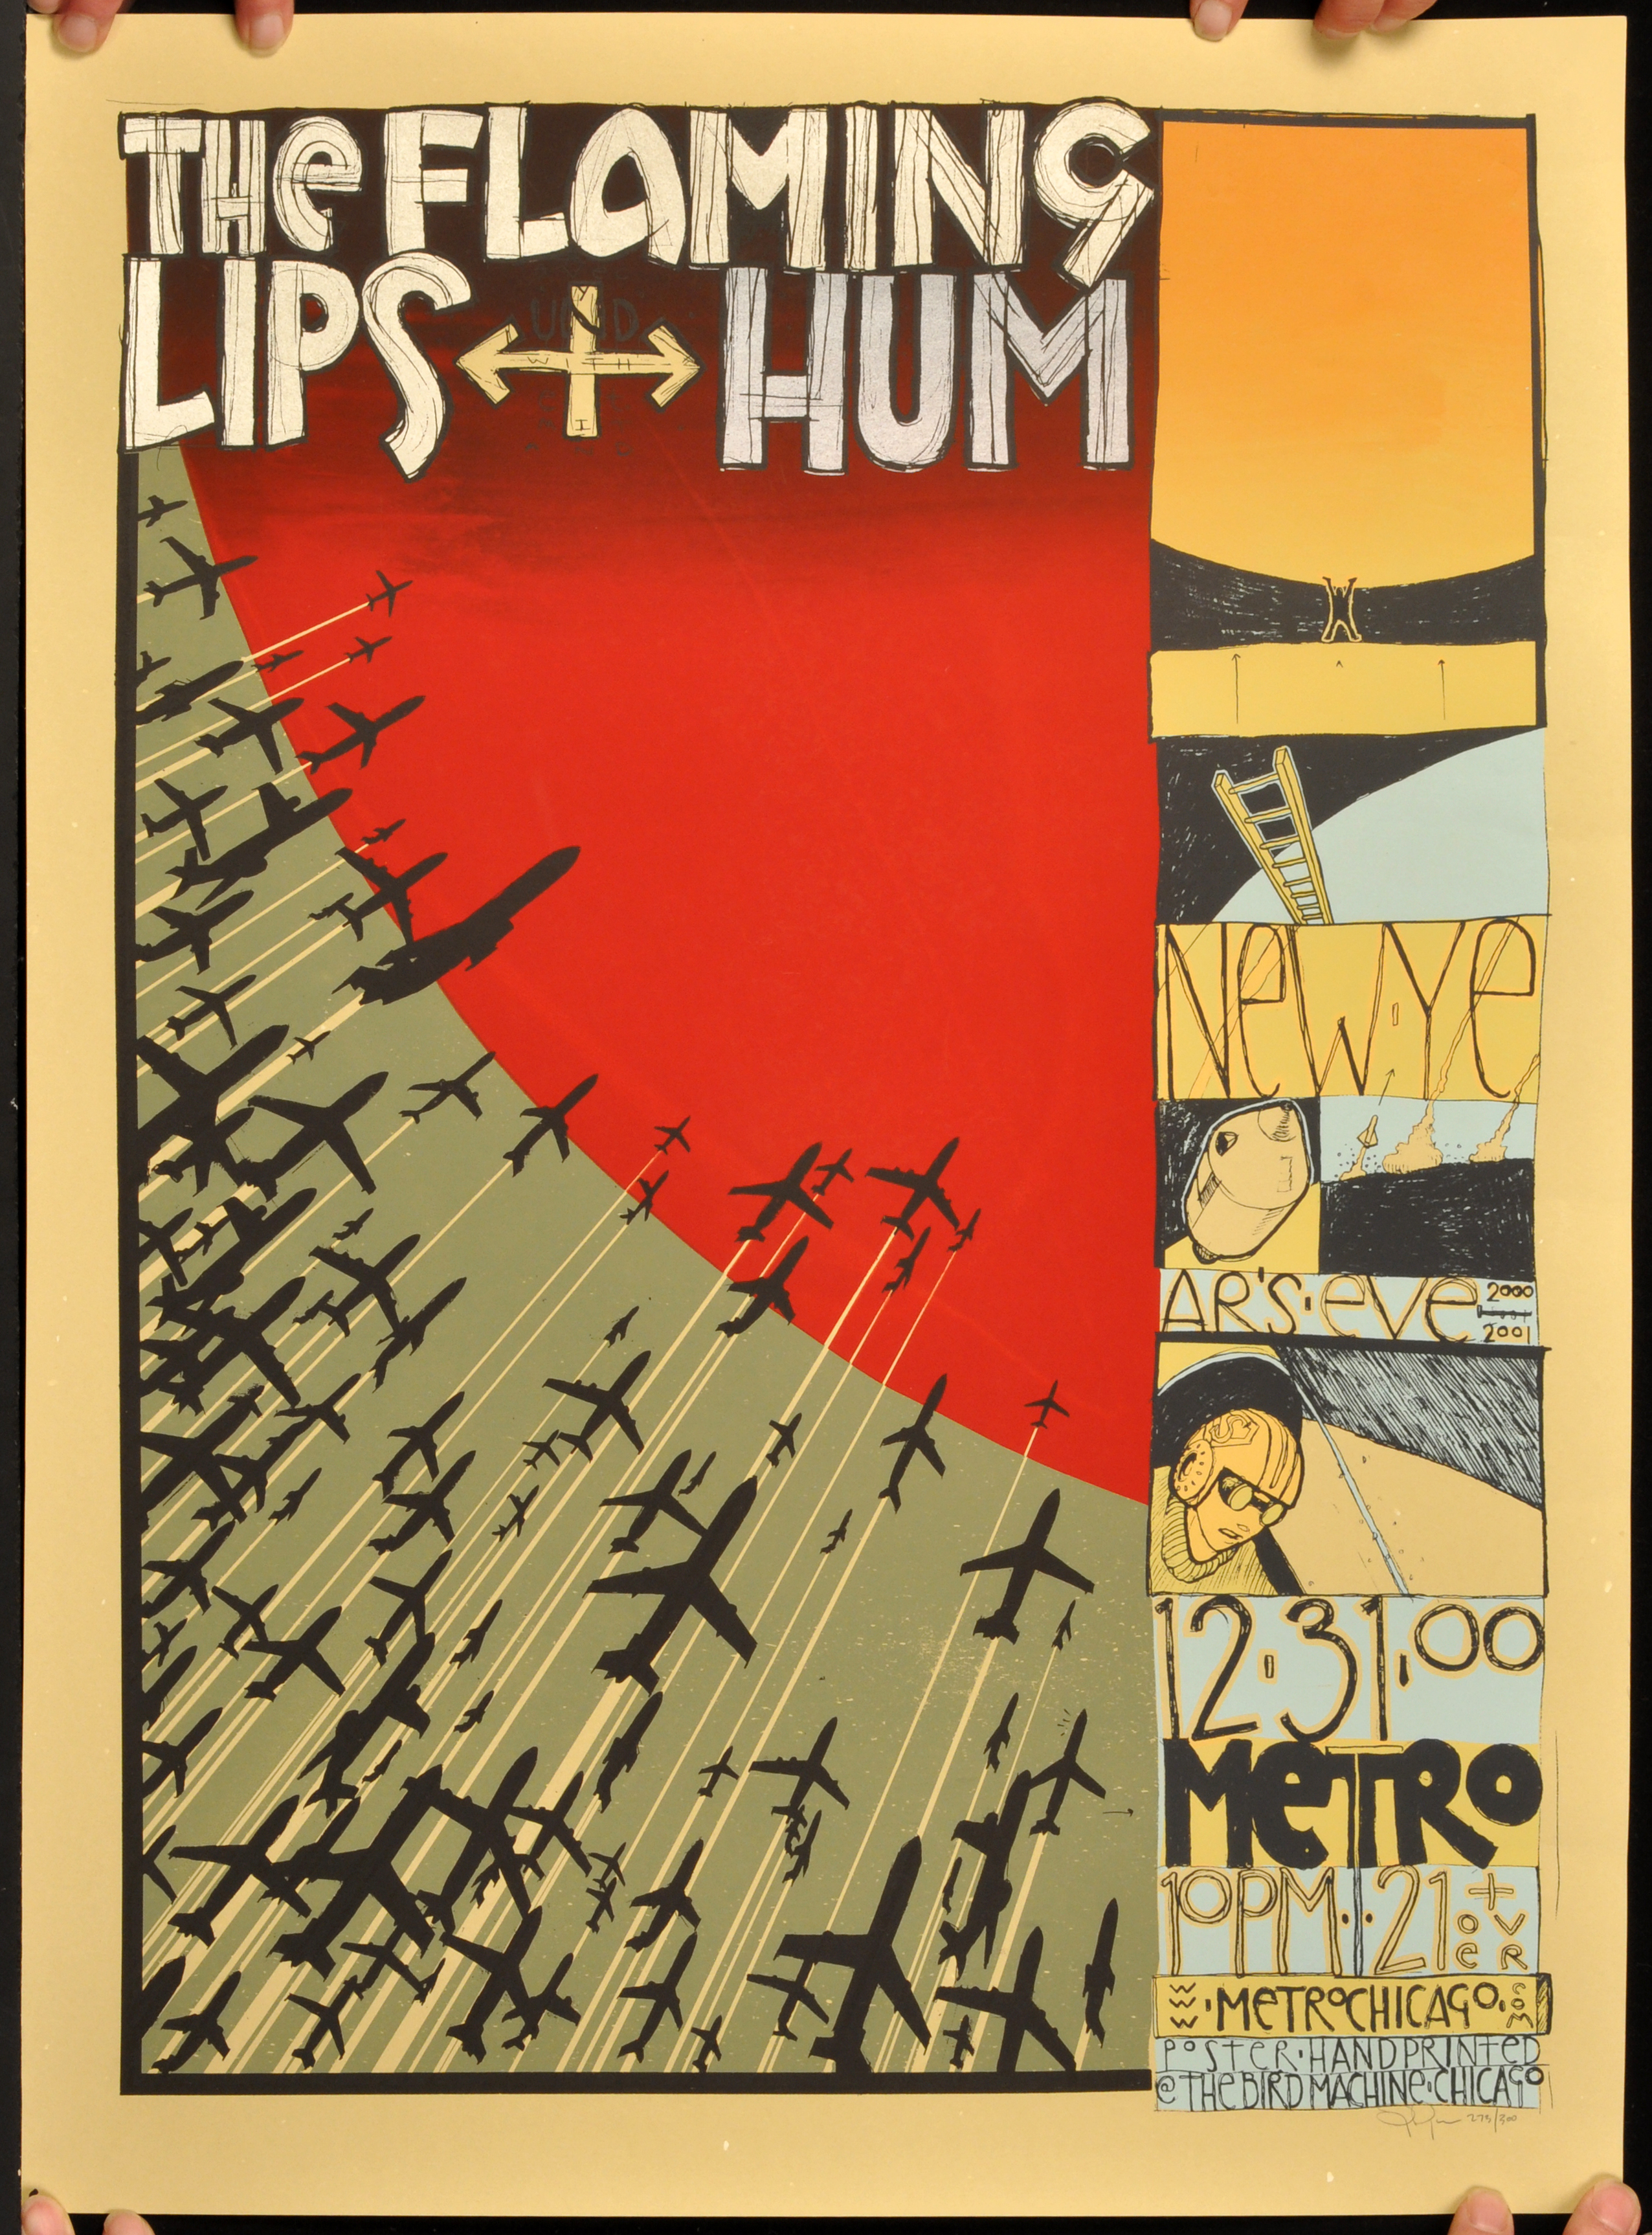
 |
| Pictured: Before photo of the silkscreen. Yes, those are our fingertips in there. Most images that are rolled we shoot under plexiglass, but the silkscreens just never look right, so we use our fingers to hold them down. |
Apart from being rolled, the poster had ink loss in the beautiful velvety red. This particular red is very fragile and extremely sensitive, so it shows even minor scuff marks. There were some printing errors in the red that were made from the screen being left in contact too long with the paper during printing. We weren't too focused on those. John's first step was to put the print through the isinglass process. We are focusing on the restoration aspect of this project, so if you want to know more about the isinglass process and silkscreens go to the "
Lost" post.
 |
| Pictured: This photo and the one below were taken after the silkscreen was temporarily mounted to the board. You can see the scuff marks and scratches in the red easier with the print laying flat. |
 |
| Pictured: I made this photo extra large so you could see a detail of one of the scratches in the red where the paper color underneath is starting to show through. |
John masked this piece himself. For masking, covering certain areas and leaving other areas open, we use a couple of different things. The main one is a special kind of tape that comes off very easily and does almost no damage to most posters. We also use acetate, a very thin plastic film, that we stick down with a temporary adhesive. With both the tape and the acetate we place them down and then use an exacto knife to cut out the shape we want and then peel away the excess. We also use a substance called miskit, which is basically liquid plastic and can be painted on very small details to cover them from the airbrushing. I know all of this sounds scary and are many of the things that I warn collectors about, but we are professionals. John has been doing this so long that very few things he sees are new to him and he took on this project because of the challenge that it presented. But, I digress. John used a combination of these things, plus some paper to cover the areas that weren't being airbrushed.
 |
| Pictured: At this point there is just tape around the edges of the red. |
 |
| Pictured: John used tape to cover most of the black planes that protruded into the red. Once he is done gently cutting out the desired shape he lifts up the excess, leaving the black plane protected. There is a printing error visible in this detail too. The lighter red streak that runs beneath the planes. |
 |
| Pictured: On the words and the arrow John used acetate because it covers large areas easier than tape. The acetate is barely visible except for the reflection. The small lettering around the arrow John covered with miskit. |
Once the red was the only color uncovered Aaron took over. Aaron is a master of his craft and he works in thin layers of paint to slowly build up a surface of color that matches. In this case we were not trying to disguise the printing errors, just fill in the ink loss from the scratches and smudges.
 |
| Pictured: This was taken right before Aaron started adding color, but its a good shot of the clean paper before red layers start to build up. |
 |
| Pictured: Each individual layer of airbrush paint is relatively translucent, its the layer upon layer that makes it opaque. |
 |
| Pictured: Aaron looking from an angle in order to better see the paint going on. |
 |
| Pictured: This is later in the process and you can see the red ink over-spray on the brown paper. |
After airbrushing the paper goes back to masking to be unmasked (that sounds very dramatic.) It can be almost as time consuming to take the mask off as it was to put on because you don't want to damage the ink or paper underneath. The tape and acetate comes off with with some gentle assistance, but the miskit is a little more of an issue. With most of the posters we use a rubber cement pick up/eraser, but because the ink on this silkscreen was so fragile this would have damaged not only the work we had just done but potentially the rest of the poster. John was able to carefully roll some off with his fingers, but Aaron had the most luck (and patience) with a small paint brush.
 |
| Pictured: John removing the tape along the edge of the red circle. This is one of the pictures that I suggest you make bigger because Aaron is grinning like crazy in the background. |
 |
| Pictured: Here is the acetate coming off. |
 |
| Pictured: Palette knives are one of the tools that all of us use, no matter what stage of restoration we are working on. Here Aaron is pulling off tape that has a lot of paint over it, so he used the palette knife to get under the tape without hurting the poster. |
 |
| Pictured: This is the miskit coming off. John used his fingers to gently roll it up into a ball and then pulled it off. Its still very plastic-y so it came off more like gum. |
 |
| Pictured: Aaron using a brush to remove the miskit from the very small airplanes. |
 |
| Pictured: I like this shot because as John pointed out, it looks like the planes are flying at Aaron. He is using a loupe to make make sure that he has gotten all of the miskit. |
And here is the final product! The difference is subtle in photographs, but it looks great in person. One of the issues when working with just about any silkscreens is the texture of the ink, most of it is so velvety that it is difficult to replicate. This matte with depth quality, as though you could climb into each individual color and walk around in it, that a lot of silkscreens capture is part of the reason that they are so appealing and why we enjoyed rising to the challenge of fixing the damage on this print. We are elated with how it turned out!
 |
| Pictured: The final after photo, laying completely flat all on its own and with scratches fixed. |
It should be noted that several crucial steps in our process have been
omitted. If you have any questions please feel free to contact us
via email at postermount@aol.com or by phone at 818.882.1214. Also
check out our websites:
http://www.postermountain.com and
http://www.lapapergroup.com/. Please feel free to leave comments or questions on the blog!


Comments
Post a Comment