This week we're going to look at just one aspect of an unusual restoration project that we just completed. A lot of posters that come into our studio are missing pieces.We have several ways to restore missing areas. Sometimes we have a reference for these, either in our own database or from the client. If there is no reference we get the opportunity to let our artists have a little more freedom and create it completely from scratch.
This was the case when one of our clients brought in a Dutch "Tarzan Triumphs" door panel. After the poster was demounted there was only a small portion that was left of the original poster and no reference for it.
 |
| Pictured: Original Dutch "Tarzan Triumphs" door panel before we did any conservation or restoration. |
 |
| Pictured: "Tarzan Triumphs" after it had been demounted. The incomparable Antonia spent about two days on the paper patch and prep needed for this poster. |
So between Aaron doing the airbrushing and Katie and Melissa working on the fine details we created an image that only exists on this one poster. The poster was originally Dutch, but we created a US 3 sheet from what was left of the original. And it looks fantastic!
 |
| Pictured: "Tarzan Triumphs" after airbrushing and detailing, but before the final credits had been added. |
The focus this week is how we silkscreened in the credits at the bottom of the poster. Poster Mountain is the only company that uses silkscreening as a restoration tool. Gabe and John worked together with the client to create the credits.
The first step, besides making sure that we had all the right information, was to format the credits to the size and font that was appropriate for the poster. Gabe used Photoshop to create stencils that were printed out on to an acetate (a clear, thin piece of plastic) sheet.
 |
| Pictured: Gabe using Photoshop to format the credits. |
 |
| Pictured: The formatted print out of what the credits will look like once they've been silkscreened on. |
Once Gabe had created a negative transfer of all the credits, he then could make the screens. Silkscreening did originally use silk, but now a nylon or polyester screen is used. Much cheaper. An even layer of a light sensitive emulsion is applied to the screen.
 |
| Pictured: Gabe prepping the screen on top of the UV light table. |
 |
| Pictured: Gabe (moving as fast as the Flash) putting the acetate on top of the screen. |
After the emulsion has dried, the screen and the acetate sheet is exposed to UV light which hardens the photo emulsion.
 |
| Pictured: Our UV light table. |
 |
| Pictured: The box acts as a weights to make sure that the acetate is laying flat against the screen. |
The area covered by the words on the acetate is not exposed and the emulsion does not harden, which allowed Gabe to wash it out. This left us with positives of the credits.
 |
| Pictured: Gabe using a pressure washer to rinse out the screen. |
 |
| Pictured: The darker orange is the hardened photo emulsion and you can easily see the negative images of the credits left after the screen was rinsed out. |
After the screens were ready we were able to start printing. Gabe used poker chips to elevate the screen up just slightly. Elevating the screen made sure that no excess ink got onto the poster when we lifted the screen up and moved it.
 |
| Pictured: Gabe taping on poker chips to the bottom of each corner of the screens. |
 |
| Pictured: Not the traditional way, but we like to improvise! |
 |
| Pictured: Gabe making sure that everything is aligned before we began printing. |
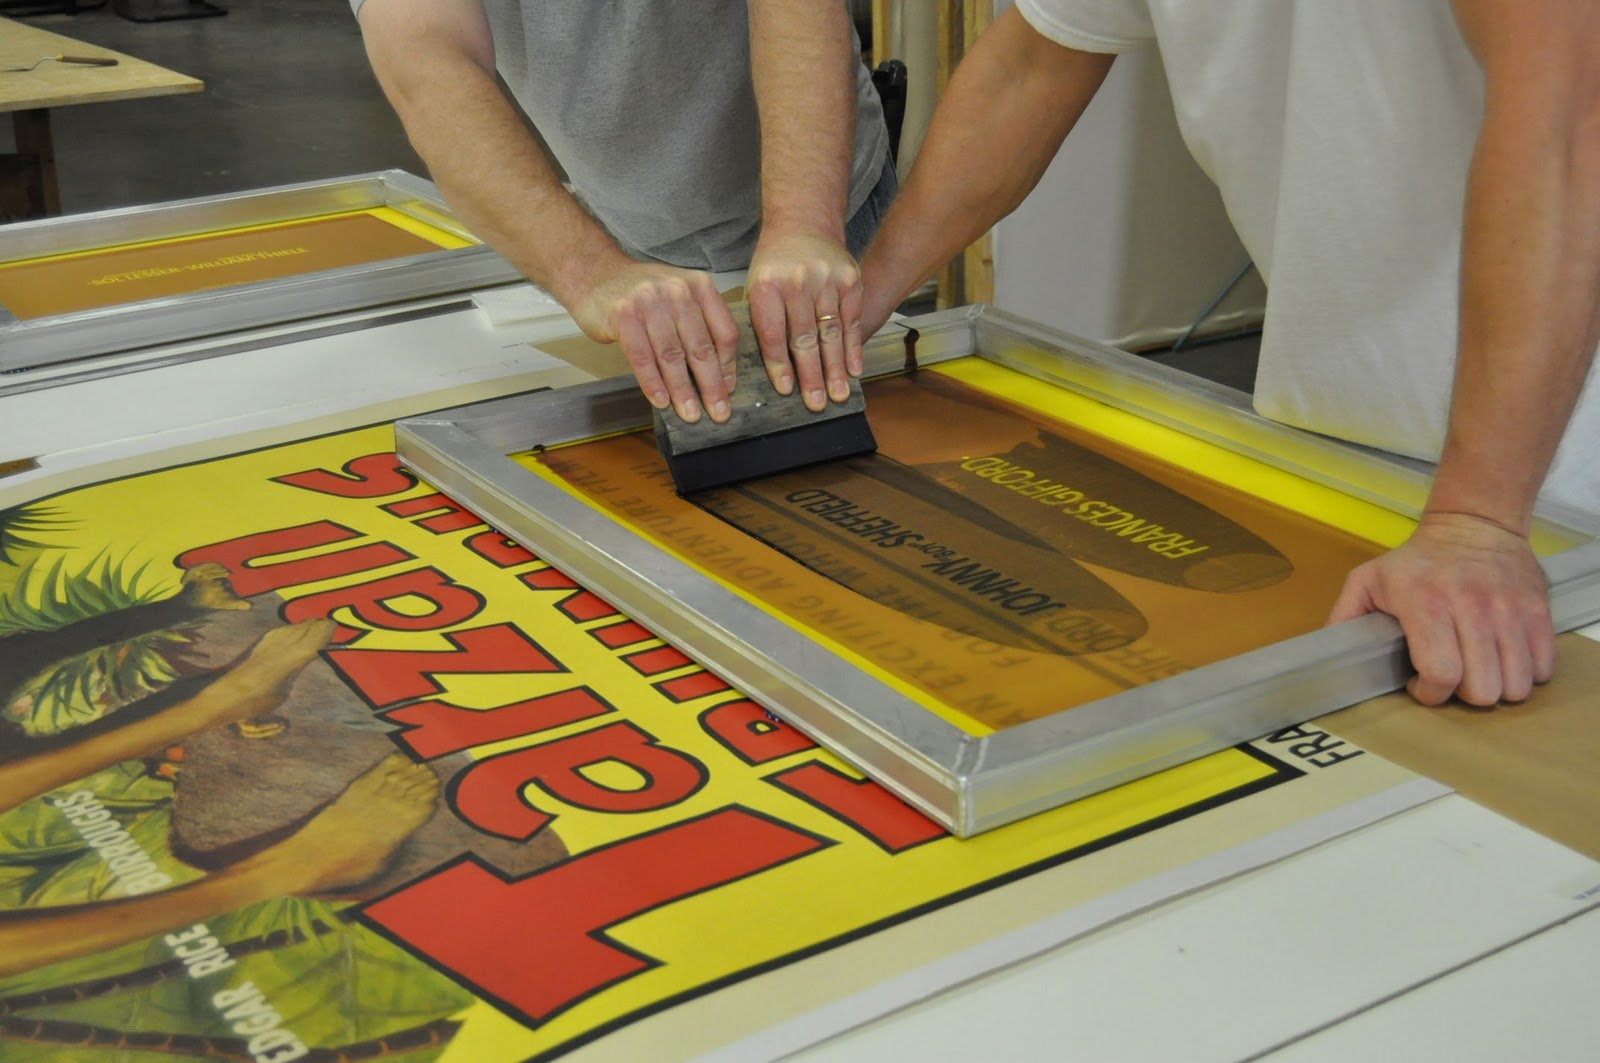
Once everything was prepared we could start printing. A small puddle of ink is layed down on one side of the screen. Then John used a squeegee (yes, that the technical term) to move the ink across the screen, all the while applying enough pressure to press the ink through the screen and onto the paper.
 |
| Pictured: Gabe putting ink onto one side of the open part of the screen. There needs to be enough ink that it spreads evenly across both the height and the width of the open area. |
 |
| Pictured: Gabe holding the screen down while John begins to move the squeegee evenly across the screen. |
 |
| Pictured: You can see where the ink as been pressed through the open part of the screen. |
 |
| Pictured: The first part of our caption! The brown paper below was a precaution to protect the lower part of the poster. |
 |
| Pictured: Frances Gifford played "Zandra," the female lead in Tarzan Triumphs. |
We did the credits in stages. It made it easier to check our work and be precise.
 |
| Pictured: John and Gabe printing the second name that is part of the credits. |
 |
| Pictured: Johnny Sheffield played the "boy" in Tarzan Triumphs. |
 |
| Pictured: This was the last of the credits These are the screen play and story credits. |
 |
| Pictured: The completed poster drying in the studio. |
Silkscreening is not a medium that we use everyday, but in a situation like this with so many words to print silkscreening allowed us to quickly, efficiently and precisely add in the finishing touches to this poster.
 |
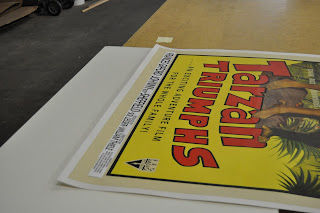
| Pictured: The completed "Tarzan Triumphs" 3 sheet poster with airbrushing done by Aaron, detailing by Katie and Melissa, and silkscreening by Gabe and John. |
It was a pretty remarkable transformation for this poster. The team put more than 40 hours of work into "Tarzan Triumphs". It started out in a different format and in a different language, but the end result turned out beautifully. We relish the opportunity to work on challenges like this one!
It should be noted that several crucial steps in our process have been omitted. If you have any questions please feel free to contact us via email at postermount@aol.com or by phone at 818.882.1214. Also check out our websites: www.postermountain.com and
http://www.lapapergroup.com/. Also, please feel free to leave comments or questions on the blog!


Comments
Post a Comment