So, occasionally we get things in that are not strictly paper based. An example of the range of ephemera that Poster Mountain is experienced with are canvas banners and over the years Poster Mountain has done a few of these. The project we are featuring this week is a Depression era Punch and Judy circus banner.
A brief history lesson on "Punch and Judy". Punch and Judy were a puppet show that evolved in Europe over several centuries and gained popularity in the 18th and 19th century as a kids show. Punch was the protagonist and Judy was a supporting character. The show followed a pretty simple, if non-sensical plot. Punch would get into mischief of one kind or another, would be caught and then an attempt to arrest him would be made by a policeman puppet. Punch would invariably end up outwitting his pursuers in a scrappy and usually violent way. Judy was his shrewish wife who was almost as abusive to Punch as Punch was to her. Over the years new characters and plots evolved and the Punch and Judy cannon has grown quite extensive. These shows were put on in town squares and during festivals by the puppeteers, usually called "Professors". Punch and Judy continued to be popular all the way up through the mid 20th century.
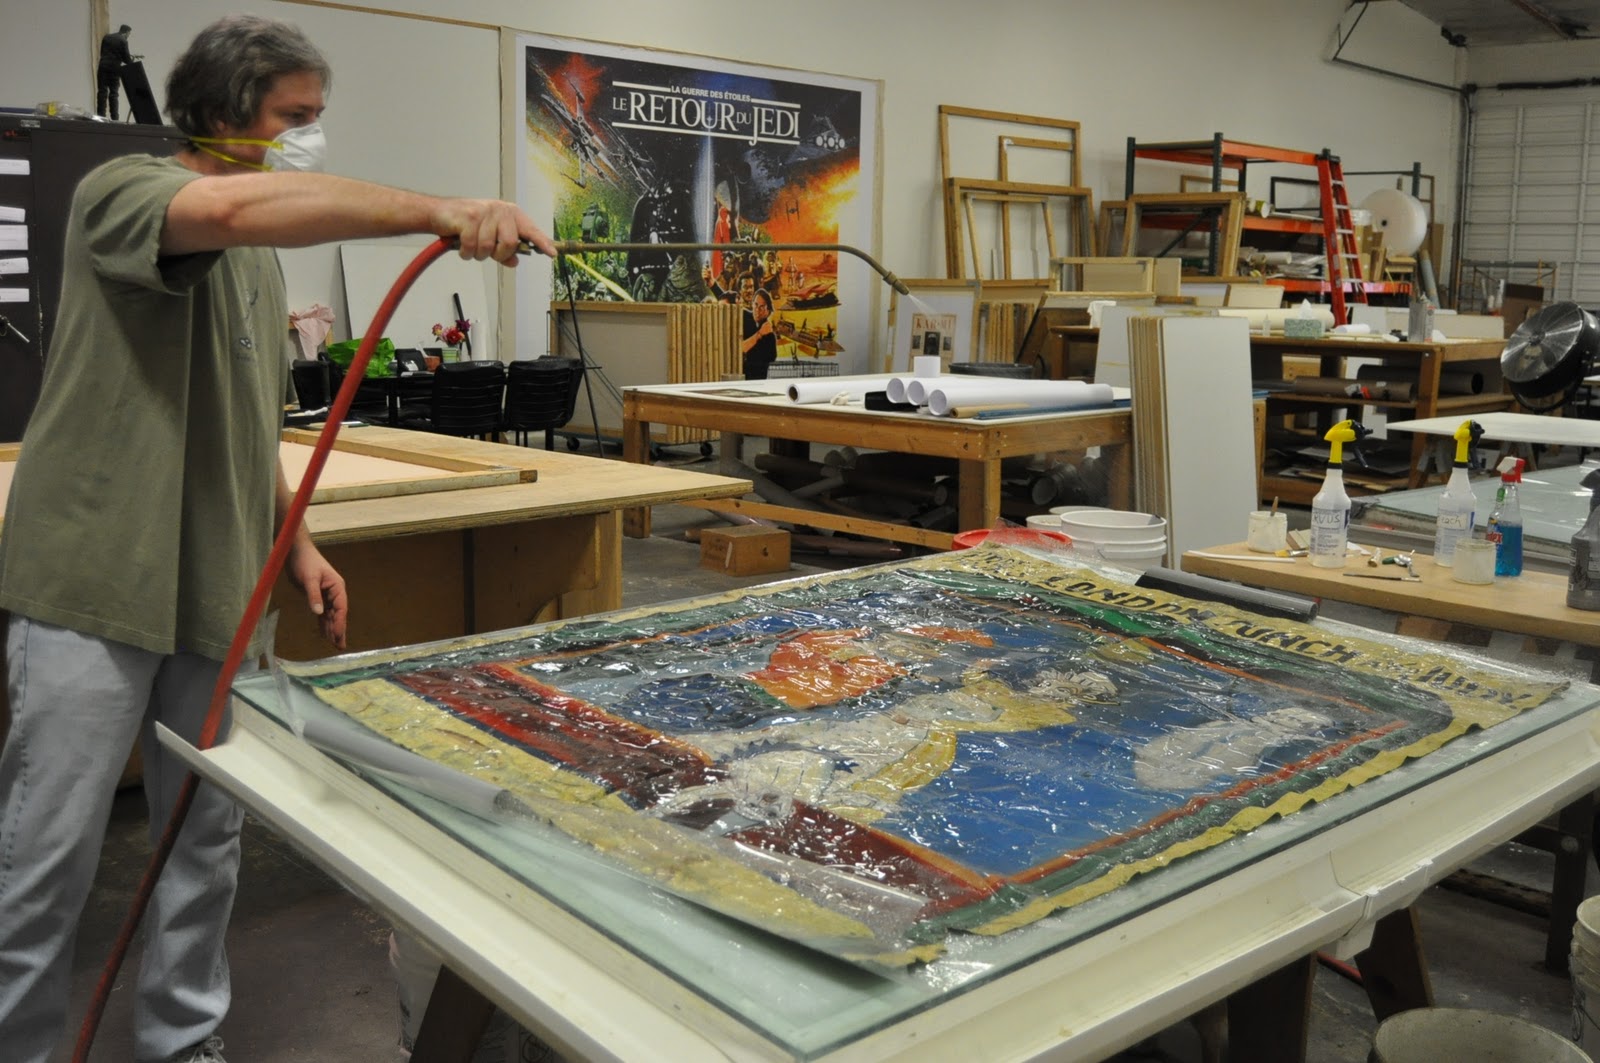
This particular circus banner is canvas that was probably painted with lead based oil paint and came into the studio in pretty bad shape. It had a huge crease up the center and was extremely wrinkled, but the biggest problem was the mold it was growing. John actually kept the banner in a plastic bag until he was ready to start working on it because it was covered in mold. Even though this only needed to be cleaned and conserved, the amount of mold made it somewhat daunting. John wore a mask through most of the process as a precaution.
 |
| Pictured: Depression Era "Punch and Judy" Circus Banner before cleaning and conservation. |
John's first step was to remove as much of the surface mold as possible. The best solution to this was to use one of the hose attachments on a vacuum. Sometimes the simplest solutions are the best!
 |
| Pictured: John vacuuming as much of the mold up as possible. |
 |
| Pictured: Robin preparing the linen backing for the banner. |
After he had gotten as much of the mold as he could with the vacuum, John started the washing process. The paint pigments were stable on this piece, so John could be pretty aggressive in trying to remove the mold.
 |
| Pictured: John unfolding the banner onto the glass topped wet table. |
 |
| Pictured: John beginning to wet down the banner. |
It is hard to see from the front of this banner how bad the mold was, but on the back the mold was pretty obvious. John washed the canvas with diluted soap and water to get as much of it out as possible.
 |
| Pictured: John wetting down the back of the banner. |
 |
| Pictured: See all those stains? Yup, that's all mold. |
When I first saw the back of this canvas I thought that the yellow, blue and green were bleed throughs from the front and that the big black stain was the only visible mold. Turns out its all mold. In most of these posts you will see that we use sheets of Mylar, a polyester film, in the conservation process. The Mylar acts as a barrier between the piece and our tools, including our hands, so that we do not damage anything while washing and cleaning.
 |
| Pictured: John massaging the canvas to loosen the mold and rinse it out. |
 |
| Pictured: John rolling out the Mylar sheet. This allows him to work more of the mold out of the canvas without damaging it. |
 |
| Pictured: John smoothing down the Mylar. |
 |
| Pictured: John squeegeeing the canvas. Check out the color of the water that is squeegeed out, pretty gross. |
Our goal was twofold with this piece. We needed to remove as much of the mold as possible, but also wanted to flatten the canvas out. Fortunately both of these things were accomplished by the conservation process.
 |
| Pictured: John removing the Mylar from the back after cleaning. |
 |
| Pictured: John beginning to apply glue to the back so that it can be mounted to linen. |
 |
| Pictured: Creases have been straightened out and now the poster lays flat. |
John mounted the canvas directly onto a linen backing. The linen gives the piece a stable surface to adhere to and makes transporting and storing much easier.
 |
| Pictured: John using the Mylar on the front of the canvas to mount it to a linen substrate. |
 |
| Pictured: John squeegeeing the Mylar and canvas so that the canvas is evenly glued to the linen. |
 |
| Pictured: The canvas retained more water than the paper posters we usually mount and mixed with the excess glue made for a messy clean up. |
 |
| Pictured: John soaking up the excess water and glue from the edges. |
This banner was not getting any restoration, so after it had dried completely it was ready to be cut out and handed over to the client. It looked much better and is a great piece of 20th century Americana.
This circus banner brings up a crucial aspect of collecting. Proper care of your ephemera is important, whether your pieces have monetary or sentimental value. You should always store things carefully in a dry, temperature controlled environment. But if there is an accident or you stumble across a badly damaged piece that you have to have, Poster Mountain is here to help. (How about that for some shameless self promoting?)
It should be noted that several crucial steps in our process have been omitted. If you have any questions please feel free to contact us via email at postermount@aol.com or by phone at 818.882.1214. Also check out our websites: www.postermountain.com and
http://www.lapapergroup.com/. Also, please feel free to leave comments or questions on the blog!


Comments
Post a Comment